Refresh Your Keyboard: Step-by-step Cleaning Guide
In this tutorial, I’ll demonstrate the most effective method for effortlessly cleaning a mechanical keyboard. While I’ve grown accustomed to its appearance and hardly notice the day-to-day changes, a surprising revelation occurred when I removed a key – quite unpleasant, to say the least. And Mac, your hair seems to have found its way everywhere – yes, I’m talking about you.
While it might require some effort, the process is remarkably simple and will undoubtedly restore your keyboard’s appearance. So, without further ado, let’s begin and bring that keyboard back to its prime.
Disconnect Your Keyboard
Initiate the process by disconnecting your mechanical keyboard. This step is essential as you’ll be delving into key removal and employing distinct cleaning methods. So, keep your keyboard unplugged for safety. For your convenience, this video is organized into chapters. Watch it in its entirety before you commence, and revisit specific chapters as needed.
Capture an Image of Your Mechanical Keyboard
Capture an image of your keyboard, and there are two significant rationales behind this practice.
- Firstly, it serves as a visual aid for remembering the key layout accurately. While you might know the general placements, details like the position of the multiplication symbol relative to the division symbol on the number pad can be tricky. Are you confident about the positions of Print Screen, Scroll Lock, and Pause/Break? This snapshot acts as a reliable reference point;
- Secondly, it enables you to visually appreciate the substantial improvement in your keyboard’s appearance once the cleaning process is complete.
Detach the Keycaps
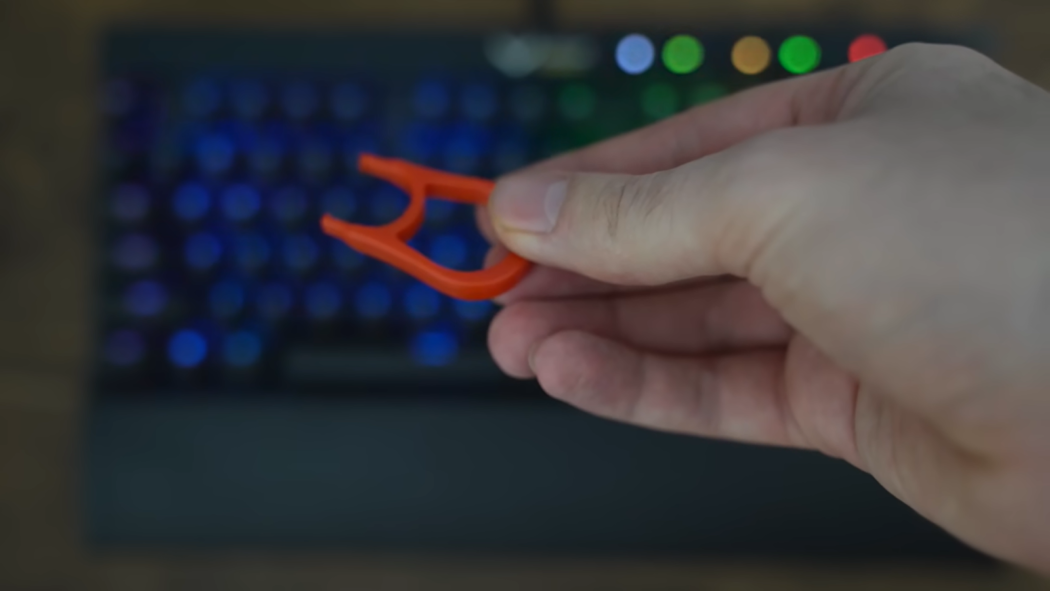
Let the enjoyable phase begin – it’s time to remove the keycaps.
- Utilize a keycap puller and begin from one end, gradually progressing to the other side. Using a plastic strainer to hold the keys is a personal preference, as it aids in the upcoming step;
- Take your time with this process, as haste can lead to unintended key damage;
- Securely grasp the key and pull directly upwards;
- If your larger keys are stabilized with metal, gently slide out one end before moving to the other.
With the entirety of the keycaps removed, the true extent of the keyboard’s condition becomes starkly evident. Hopefully, I won’t allow it to deteriorate to this extent again.
Cleanse the Keys with Water
Now, proceed to the sink and rinse the keys under warm water. I find it beneficial to perform this step first to eliminate as much debris as possible before proceeding. The strategic use of a strainer aids in washing away a significant amount of debris.
Immerse the Keys
- The subsequent phase entails acquiring a bowl, adding dish soap, and filling it with warm water;
- It’s important to avoid using boiling water to prevent any potential key damage;
- Submerge the keys in the soapy water and gently agitate them;
- The dish soap serves as a degreaser, necessitating a 15-20 minute soak for optimal effectiveness.
Сleanse the Keycaps
It’s now time to initiate the actual washing and cleaning of the keycaps.
- Position the bowl back in the sink and allow warm water to flow into it;
- Use your hand to gently stir the keys, quickly rinsing away the remaining soap residue;
- Prepare a couple of microfiber towels for the next step;
- Lay one towel down and utilize the other to clean and dry each individual key;
- Opting for microfiber towels over paper towels is wise, as the latter may leave behind small white particles.
As you progress through each keycap, you’ll notice their improved appearance. After cleaning, lightly tap each keycap against the towel to eliminate excess water. While there’s no need to go overboard, removing as much water as possible at this stage will expedite the drying process – it takes a few hours for them to completely dry. Utilize this drying time to focus on cleaning the keyboard itself.
Clean the Keyboard
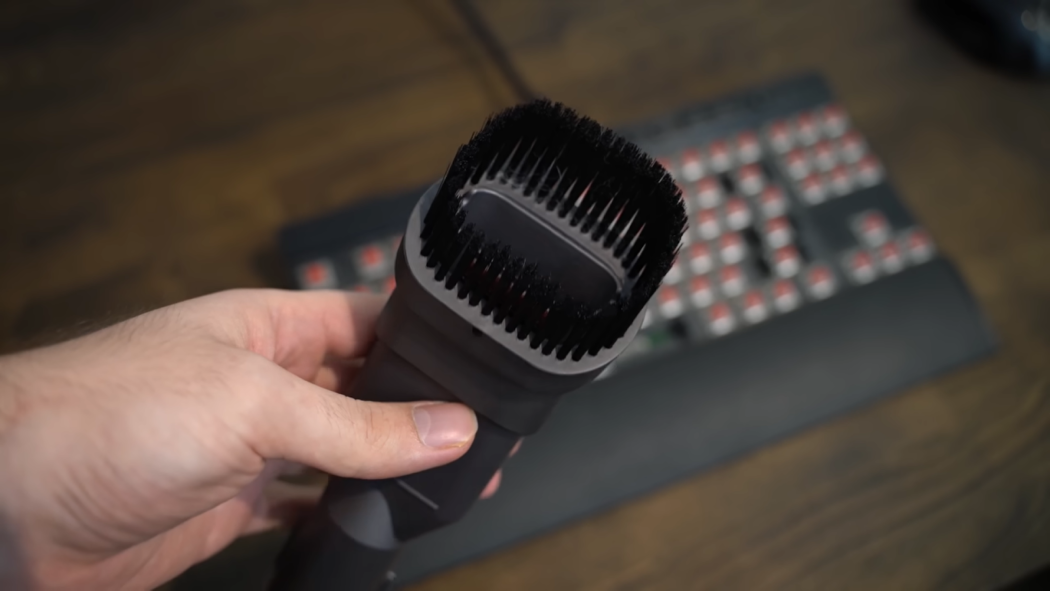
While some individuals employ a vacuum, it’s recommended to use a brush if you lack an anti-static attachment. Whether it’s a paintbrush, hard bristle brush, or the brush attachment of your vacuum, gently sweep around the switches to dislodge loose debris.
- Be mindful not to exert pressure on the switches while brushing, as the objective is to prevent any particles from entering the keyboard;
- Now, for a more thorough cleaning, use Q-tips. You can opt for water or Isopropyl alcohol, as per Corsair’s recommendation. In either case, a damp Q-tip should suffice.
- Take your time and meticulously work around the entire keyboard.
This step is particularly effective for removing any residue left behind by spilled drinks. Maintain a gentle touch without applying excessive force. By now, your keyboard should be looking significantly cleaner. Conclude this phase by giving the keyboard a final wipe with a microfiber towel. Once more, avoid paper towels to prevent leaving white particles on the keyboard.
With the cleaning complete, place your keyboard upside down to facilitate drying while you wait for the keycaps to dry thoroughly.
Reinstall the Keycaps
The culmination of your efforts arrives as you reinstall the keycaps. Approach this step with patience and diligence.
- Ensure that each key is thoroughly dry, then position it precisely over the corresponding switch;
- Press down firmly until you hear the gratifying click;
- Refer to your initial photograph for guidance, and this process should be completed within a matter of minutes.
With that, your task is accomplished. Your keyboard is now revitalized, and you’ve gained the insight that the cleaning process isn’t as daunting as it may seem – a practice that will undoubtedly contribute to the keyboard’s longevity.
Conclusion
I trust that this video has provided you with valuable guidance. Remember my oft-repeated adage: invest wisely from the outset or prepare to invest again! Best of luck, and until next time, take care!